How to Automate Contract Sending and Signature Collection (So Nothing Gets Stuck in Someone's Inbox)
Manually attaching contracts, emailing them, and chasing signatures is one of the most time consuming tasks in any service business. Here's how to automate the full contract lifecycle, from sending to signing to filing, so nothing slips through the cracks.
Wambui Ndung'u

The client said yes. You've got verbal confirmation. You're excited. And then, you spend the next three days chasing a signature on a contract that's sitting in their inbox, unopened, buried under 200 other emails.
This happens in almost every service business. And it doesn't have to.
By the end of this post, you'll have a system that sends your contract the moment a deal is confirmed, follows up automatically if it's not signed, notifies you the moment it is, and files the signed copy without you touching a thing.
The Real Problem With Manual Contract Workflows
Here's the typical manual contract process:
- Deal confirmed → remember to find the contract template
- Open the template → manually edit the client details
- Attach it to an email → write the email → send
- Wait 3 days → send a polite follow-up
- Wait 2 more days → send a slightly less polite follow-up
- Client signs → you save it somewhere (hopefully the right folder)
Every one of those steps except the client actually signing can be fully automated.
When contracts are manual, three things happen regularly:
- Details get missed — wrong dates, old pricing, incorrect scope
- Signatures get delayed — because there's no consistent chaser
- Signed copies get lost — buried in email threads or saved in the wrong place
An automated contract workflow removes all three failure points.
What You'll Be Able to Do After This
Once this automation is running, here's what the contract process looks like:
- ✅ A trigger fires (deal won, proposal approved, or payment received)
- ✅ A contract is generated automatically from your template with the correct client details
- ✅ It's sent to the client for signature, no manual email required
- ✅ Automatic reminders go out at day 3 and day 7 if unsigned
- ✅ You're notified the moment it's signed
- ✅ The signed PDF is filed in the right Google Drive folder automatically
- ✅ Your onboarding sequence kicks off automatically
How It Works: Step by Step
Step 1: Choose Your E-Signature Tool
Before building anything in Make.com, you need a tool that handles digital contract signing. Here are the three most practical options:
| Tool | Best For | Make.com Integration | Cost |
|---|---|---|---|
| PandaDoc | Agencies & consultancies | ✅ Native | Free tier available; paid from ~$19/mo |
| DocuSign | Enterprises & complex contracts | ✅ Native | From ~$15/mo |
| Signaturely | Small teams, simple contracts | ✅ Via webhook | From ~$12/mo |
For most small-to-mid-size service businesses, PandaDoc is the best starting point. It handles both document creation and e-signatures in one place, has a generous free tier, and integrates cleanly with Make.com.
💡 Pro tip: If you're already using DocuSign through another business process, stick with it. The Make.com integration works well. Only switch tools if you're starting fresh.
Step 2: Build Your Contract Template
In your chosen e-signature tool, create your standard contract with placeholder variables.
Include variables for anything that changes between clients:
[client_name]
[company_name]
[project_scope]
[start_date]
[project_value]
[payment_terms]
[delivery_date]
[client_email]
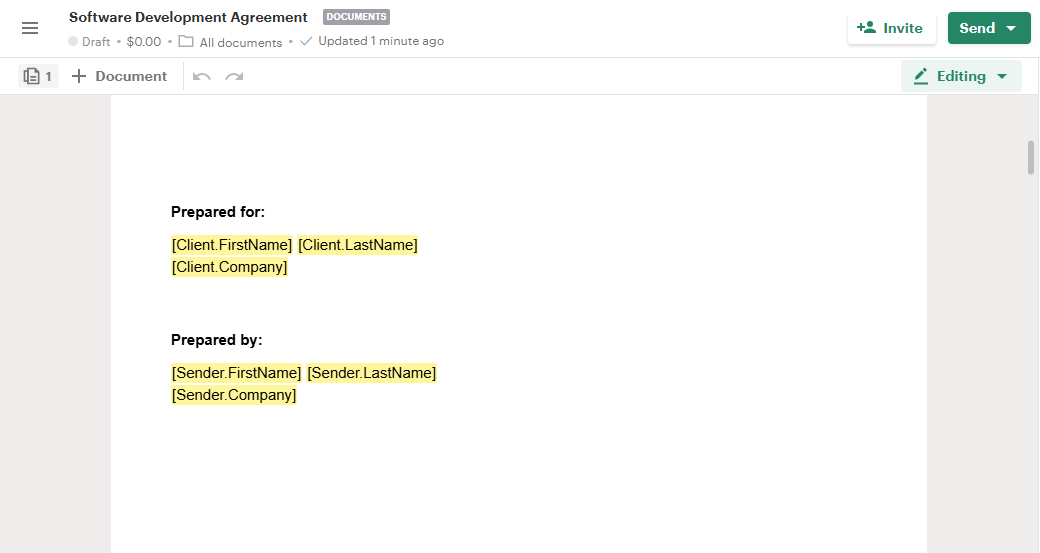
Once your template is set up, you won't need to edit the contract itself again, only the variables change. The legal language, the terms, the layout, all of it stays the same. Only the client-specific details get swapped in.
If on a budget, or just want to test things out first, you can create a template on google docs with the variables:
{{client_name}}
{{company_name}}
{{project_scope}}
{{start_date}}
{{project_value}}
{{payment_terms}}
{{delivery_date}}
{{client_email}}
✅ After this step: You have a contract template that can be populated instantly with any client's details.
Step 3: Define Your Trigger in Make.com
Your trigger is the event that means "this client is confirmed and it's time to send a contract." Pick the one that fits your current workflow:
Option A — CRM Stage Change If you use a CRM (like HubSpot or Pipedrive), the trigger is: deal moved to "Won" or "Proposal Accepted" stage.
Option B — Form Submission If clients fill in a "ready to proceed" form (a good practice), use that form submission as the trigger.
Option C — Manual Trigger If your deals happen via phone or in-person, you can use a simple Make.com webhook you trigger manually, a button in your browser or a Slack command.
⚠️ Important: Make sure your trigger only fires when you're genuinely ready to send a contract. A contract going out prematurely before you've actually confirmed the deal is worse than a delayed one.
✅ After this step: You know exactly what event starts the automation.
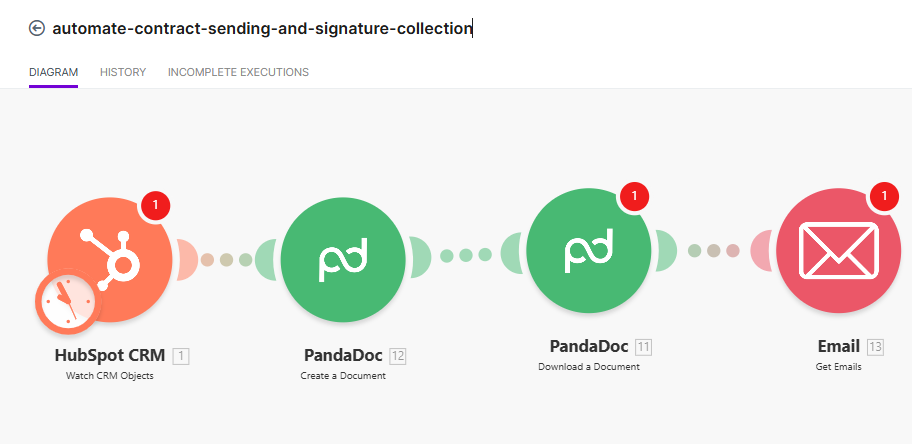
Step 4: Build the Make.com Scenario
Your Make.com scenario connects your trigger to your e-signature tool. Here's what it needs to do:
Module 1 — Your Trigger Whatever event you chose in Step 3. This fires the rest of the scenario.
Module 2 — Pull Client Details If the trigger doesn't already include all the client information, add a module here to pull it. For example, if your trigger is a CRM stage change, use a "Get Record" module to fetch the full deal details.
Module 3 — Create Document from Template (PandaDoc) Use the PandaDoc "Create Document from Template" module. Map each variable in your contract template to the corresponding field from your CRM or form data.
Module 4 — Send Document for Signature (PandaDoc) Use the PandaDoc "Send Document" module. Add the client's name and email address as the signer. You can also add yourself as a second signer if you countersign contracts.
Module 5 — Notify Yourself Send a Slack message or email to yourself confirming the contract has been sent. Include the client name and a link to the document in PandaDoc.
Step 5: Configure Automatic Reminders
Inside PandaDoc (or DocuSign), you can set up automatic reminder emails that go to the client if they haven't signed within a set number of days.
A good reminder schedule:
- Day 3: Friendly nudge — "Just wanted to make sure this didn't get buried!"
- Day 7: Slightly firmer — "We're holding your project slot until this is signed."
These reminders send from inside your e-signature tool You don't need additional Make.com modules for this. Just configure it once in the tool settings.
💡 Pro tip: Keep reminder emails short and conversational. A one-line reminder that sounds like you wrote it gets signed faster than a formal automated notice.
Step 6: Trigger Actions When the Contract Is Signed
This is where the automation really pays off. When PandaDoc fires a "Document Signed" webhook, Make.com catches it and automatically:
- Moves the deal to the next stage in your CRM
- Sends a welcome email to the client (the first step of onboarding)
- Creates the project in ClickUp or Notion
- Files the signed PDF in the correct Google Drive folder
- Notifies your team in Slack that a new client is confirmed
All of this happens within seconds of the client clicking "Sign."
✅ After this step: You have an end-to-end contract workflow from trigger to sending to signing to onboarding that runs automatically.
Tools You'll Need
| Tool | Purpose | Cost |
|---|---|---|
| PandaDoc | Contract templates & e-signatures | Free tier; from ~$19/mo |
| Make.com | Automation engine | Free tier available |
| Google Drive | Filing signed contracts | Free |
| Gmail or Slack | Internal notifications | Free |
| Your CRM (Airtable, HubSpot, Google Sheets, etc.) | Trigger + deal tracking | Varies |
Common Mistakes to Avoid
Sending contracts before they've actually been confirmed. Automation is fast, sometimes too fast. Make sure your trigger only fires when the deal is genuinely done. A contract sent before a client expects it can feel pushy. Add a manual approval step if you're unsure.
Not testing the variable mapping before going live. Run a test with dummy data. Check every single placeholder: does it populate correctly? Is the formatting right? Is the date format what you expected? Fix these in testing, not when a real client is on the receiving end.
Skipping the self-notification step. You should always know when a contract goes out. Don't build an automation that sends contracts silently. A quick Slack or email alert keeps you in the loop without slowing anything down.
Not filing signed contracts in a consistent place.
A signed contract that exists only in your email inbox is a contract waiting to get lost. Always include a step that saves the signed PDF to a named folder in Google Drive, something like Clients > [Client Name] > Contracts.
Using one contract template for everything. If you have multiple types of work (retainer, one-off project, consultancy), build a template for each one. The extra 20 minutes per template will save you hours of awkward edits down the line.
What You've Just Built
You now have a complete contract workflow that:
- Sends contracts automatically when deals are confirmed
- Follows up automatically if they're not signed
- Notifies you the moment a signature lands
- Files everything in the right place
- Kicks off onboarding without any manual handoff
Your client experience is now consistent, professional, and fast, from the moment they say yes.
What to Do Next
Contract signing is the gateway to onboarding. The next step is making sure everything that follows the signature; the welcome email, the project setup and the kickoff call happens just as automatically.
If you'd like help mapping this out for your specific contract setup, book a free consultation here and I'll guide you through it.
Keep reading — you might also like these

No More Dropped Leads: Automating Client Onboarding for Founders Freedom Africa
How we used ClickUp and Make.com to automate every onboarding touchpoint for Founders Freedom Africa — from welcome email to signed agreement, with no manual handoffs.

From 6 Hours to 4 Minutes: Automating Proposals for Founders Freedom Africa
How we automated Founders Freedom Africa's proposal process using Google Forms and Make.com — cutting proposal creation from hours to minutes, with follow-up built in.